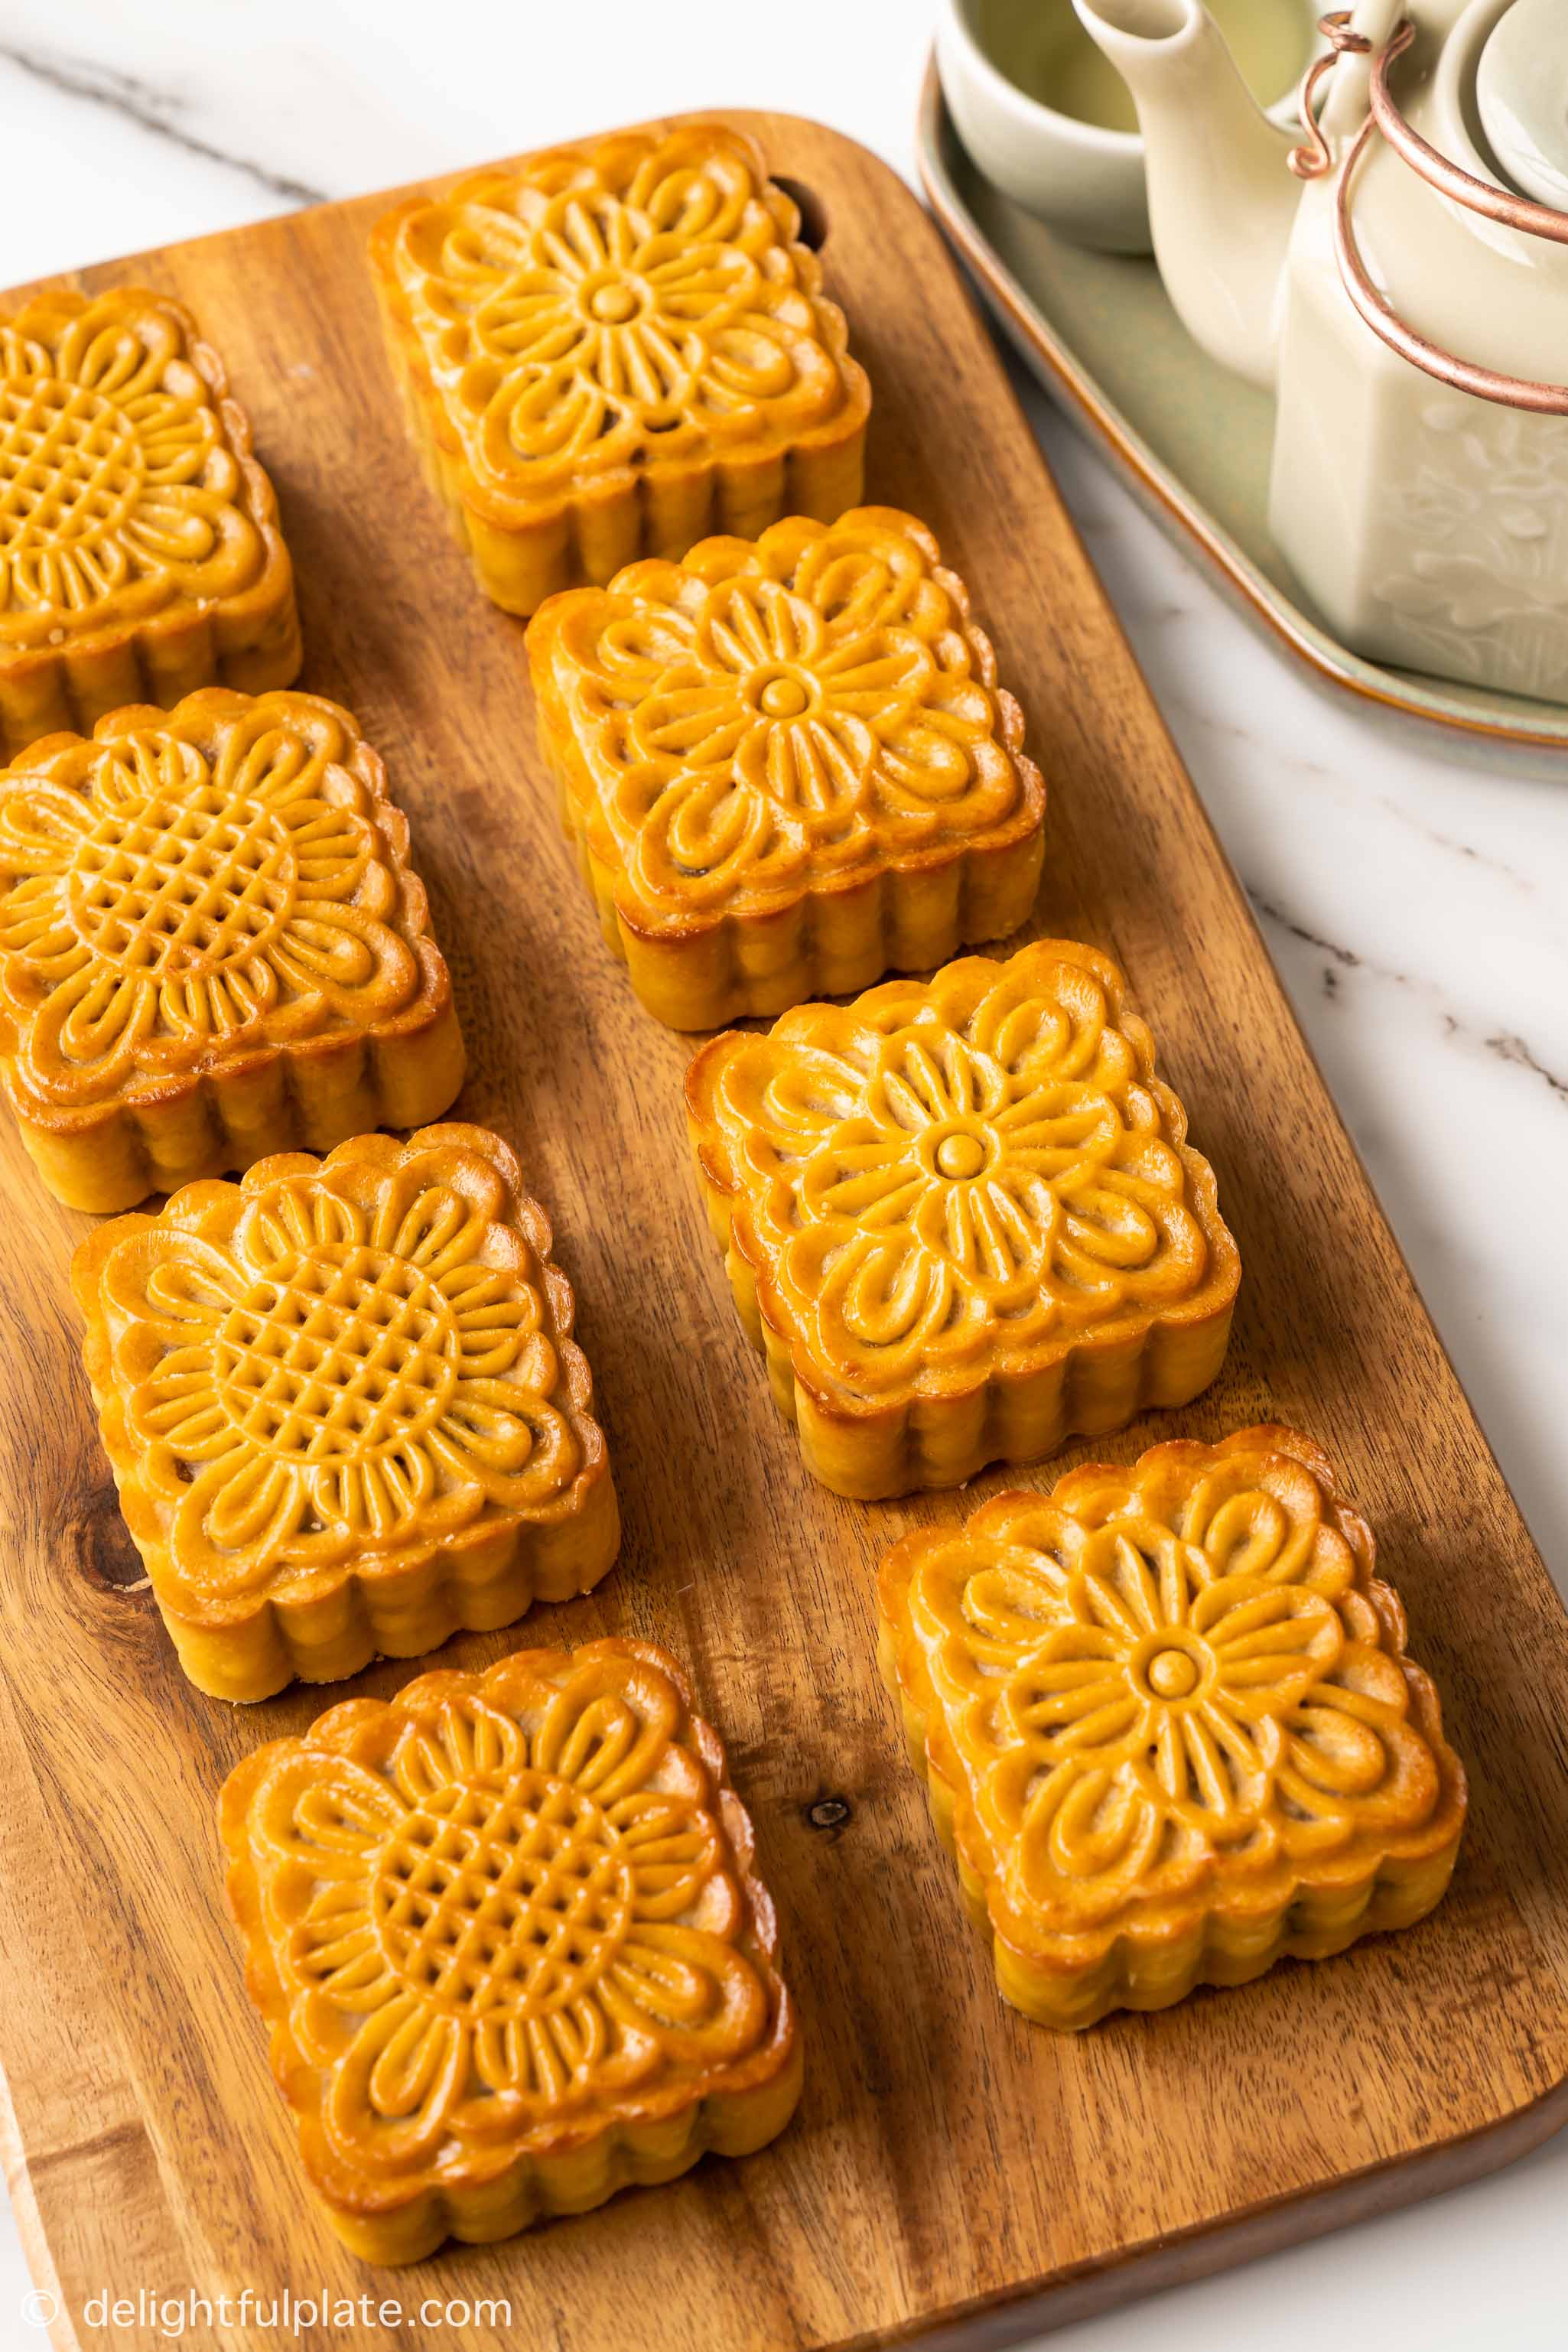
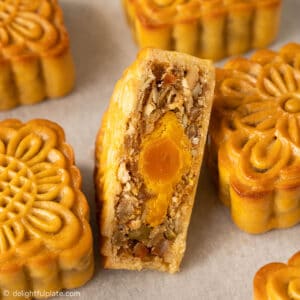
Vietnamese Mooncakes (Banh Trung Thu Nhan Thap Cam)
Mooncake is a delicacy of the Mid-Autumn festival. This recipe includes step-by-step instructions as well as a video to show you how to make traditional mooncakes from scratch without store-bought golden syrup or lye water.
The filling in this recipe is the Vietnamese traditional one with mixed nuts, candied fruits, and cooked meat. I will also include some notes on other fillings such as black sesame and mung bean so that you can easily adapt to your taste.
Why Making Mooncakes at Home
Mooncakes are often enjoyed during Mid-Autumn festival in some Asian countries such as Vietnam and China. Making mooncakes at home isn’t a quick task, and nowadays, commercially-made mooncakes are sold in many places with all kinds of flavors in the month leading up to the festival. So… why bother?
First of all, store-bought mooncakes are just too sweet for my taste. I also find them on the greasy side, and sometimes with an unpleasant smell that feels stale. Besides, it is getting harder and harder for me to find mooncakes with the exact flavors we grew up with, even in Vietnam.
Lastly, I believe preparing festive food at home is one of the best ways to enjoy the festival to the fullest. Whether it’s making bánh chưng (square green rice cakes) for Lunar New Year or bánh trung thu (mooncakes) for Mid-Autumn Festival, I always enjoy the excitement the process brings.
Why This Recipe
This is already our second year making mooncakes, so we have accumulated quite a bit of cooking notes and tips. Some quick google searches will tell you that making them requires golden syrup and lye water (kansui, nước tro tàu – an alkaline solution). They are not typical ingredients you can find in regular grocery stores. What I like about this mooncake recipe is it doesn’t use store-bought golden syrup or lye water.

The recipe for the mixed nuts filling has the authentic flavors that will remind many Viet people of their childhood. This Vietnamese mooncake is called “bánh nướng nhân thập cẩm“. The filling is sweet-savory with many different textures and aromas.
Fresh mooncakes with homemade filling smell wonderful with the right amount of sweetness. I made the video below to show you all the steps. Preparing the filling is from the beginning to the 2m46s mark. Preparing the dough, shaping and baking the cakes is from the 2m46s mark to the end of the video.
How to Make Mooncake Dough
As I’ve said earlier, mooncakes usually requires golden syrup and lye water. Together, they will make the dough moist, tender, and thin while still capable of being shaped into beautiful patterns. Besides, they also add a yellow color to the dough. So how to create mooncakes at home without lye water?
1. You can easily make golden syrup with just sugar, water and lemon using my homemade recipe here. Prepare the syrup at least a week before making the cakes. We find that “aged” golden syrup gives the cakes a richer color and more tenderness.
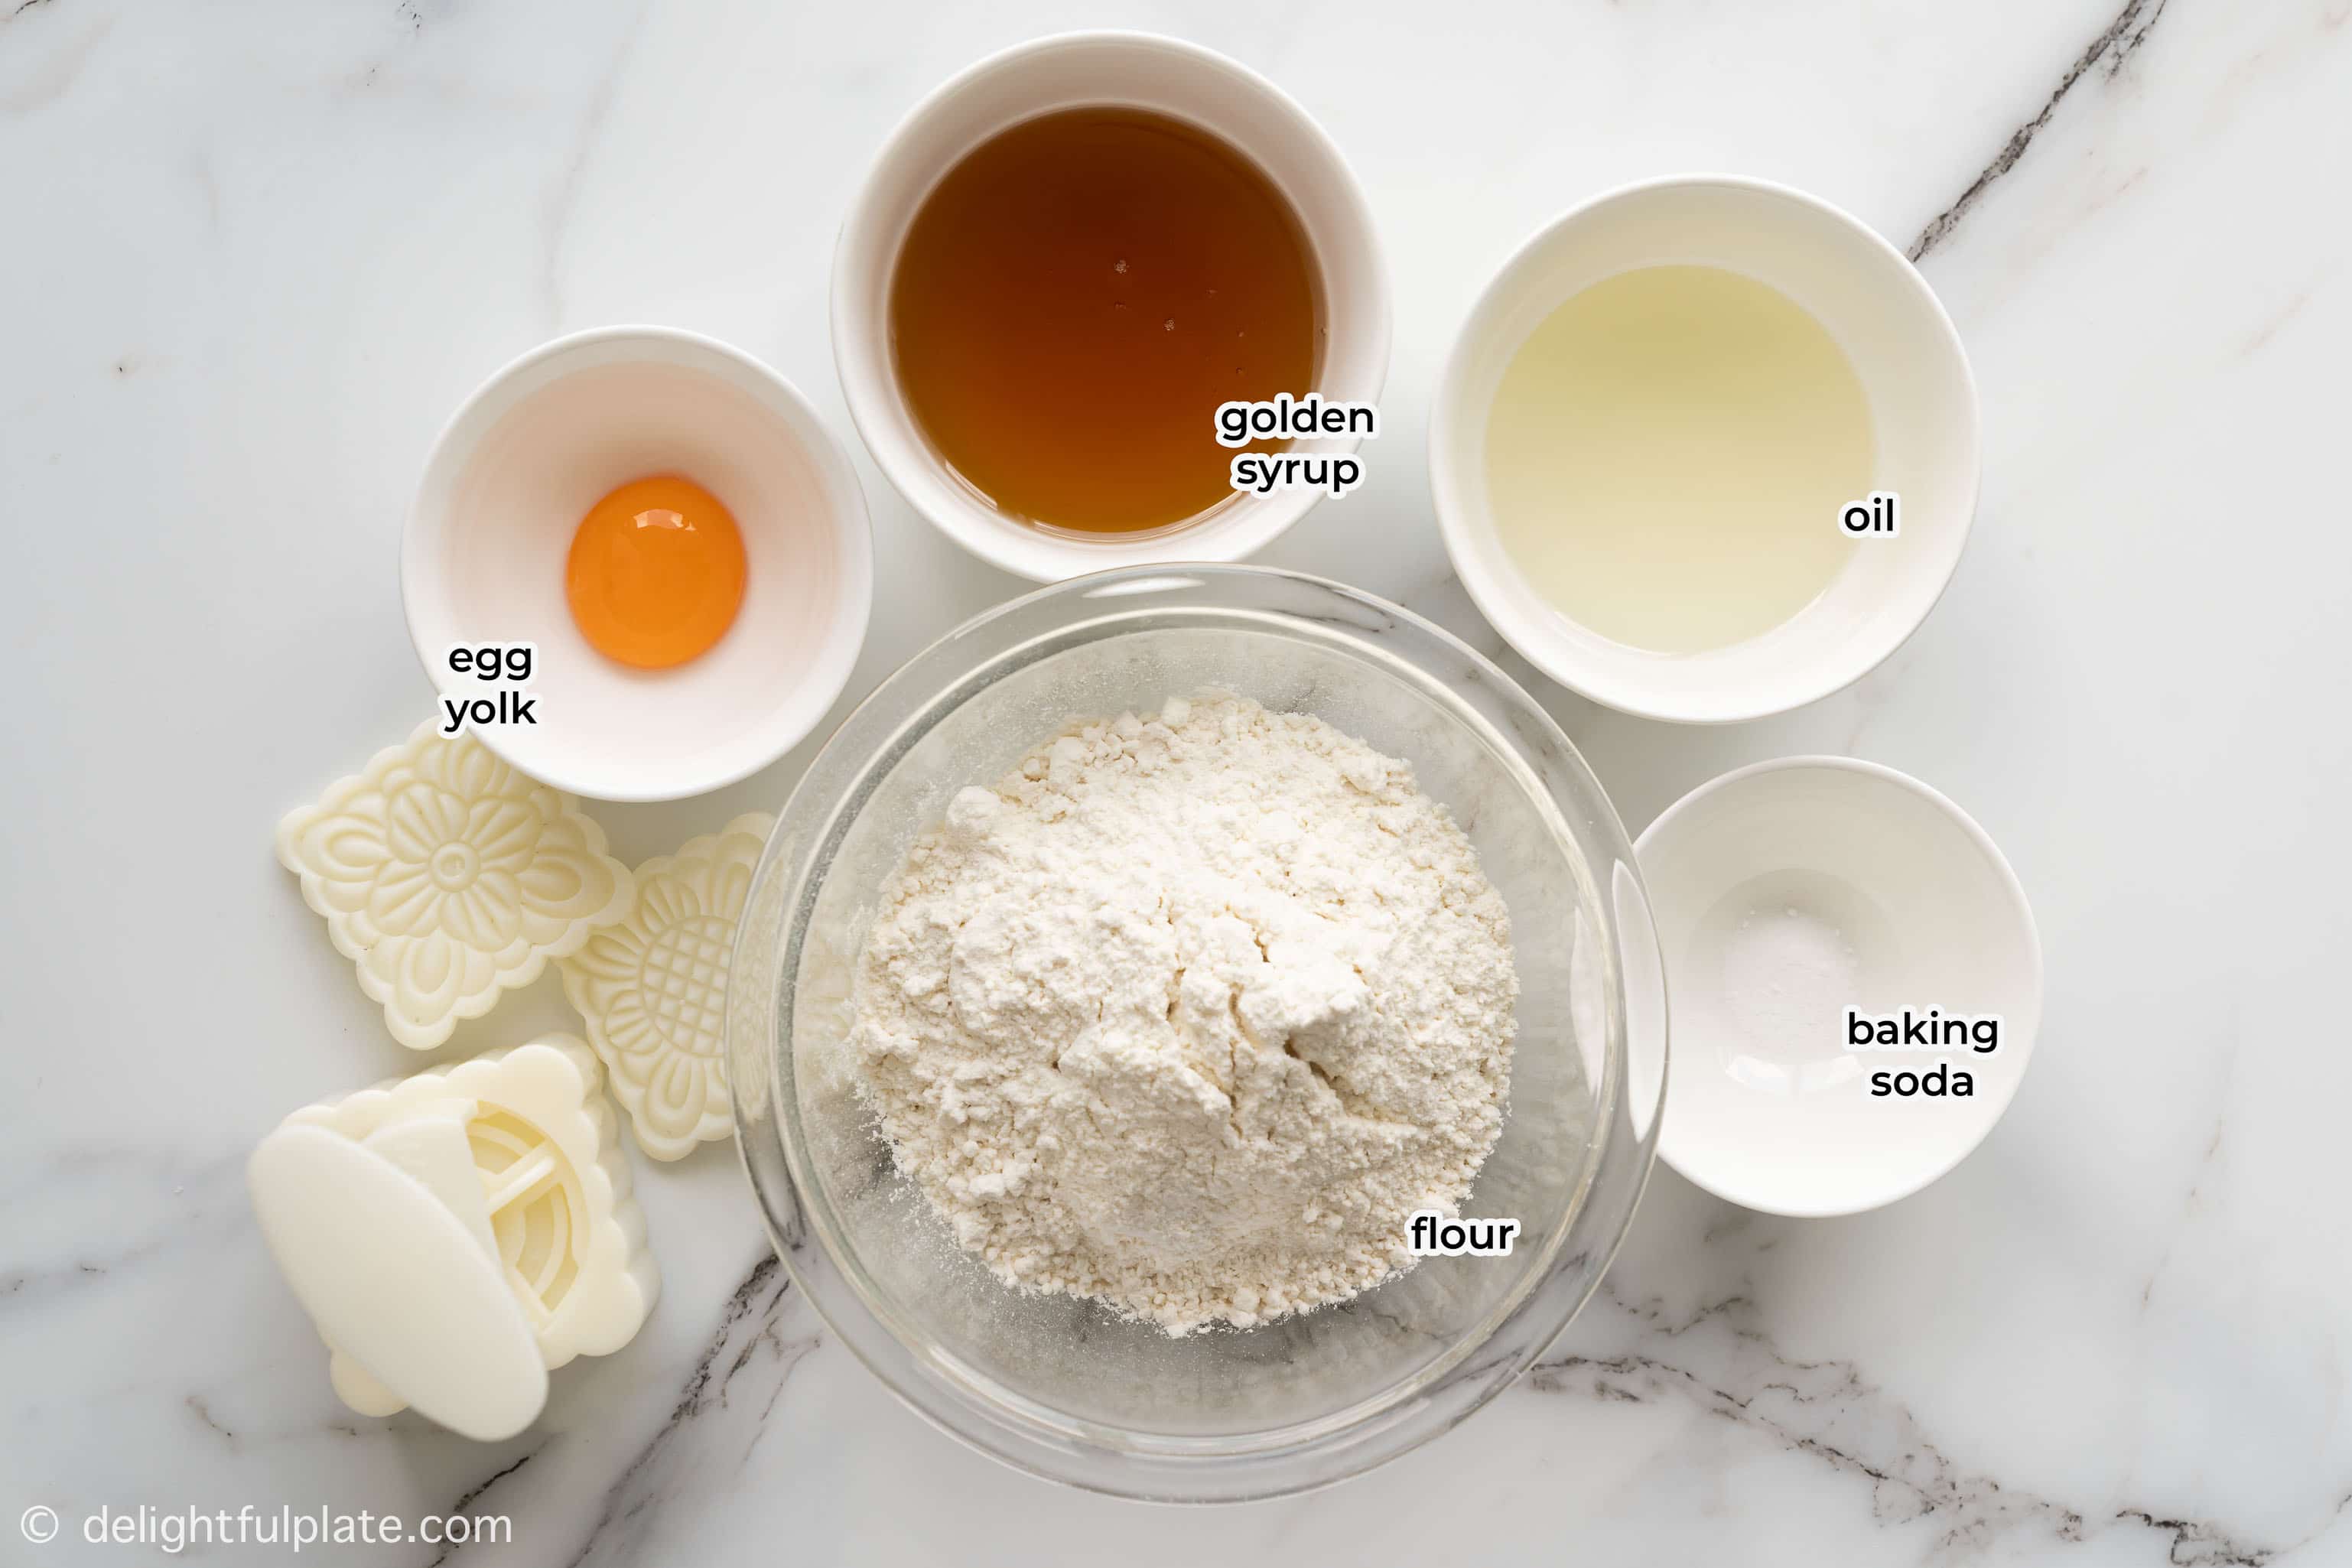
2. As for lye water, we replace it with a bit of baking soda. I would say that the commercially made mooncakes are still a little more tender, but I don’t feel like we are missing out too much without lye water.
3. An additional way to increase the cakes’ tenderness or softness is to use cake flour instead of all-purpose flour. We have tried both and like both.
How to Make Traditional Mooncake Filling
Let’s look at the filling for the most traditional Vietnamese mooncakes. It is made from six groups of ingredients. That sounds like a lot, doesn’t it? Is it a must to use all of them? Some ingredients can be omitted or have substitutions.
1. Nuts and Seeds: I use pumpkin seeds or pepitas (hạt bí), watermelon seeds (hạt dưa), cashew (hạt điều), white sesame seeds (mè trắng).
You can use a combination of what you can find. I think pepitas, cashew and white sesame seeds are pretty easy to find these days. Sunflower seeds can also work.
2. Candied fruits: candied winter melon (mứt bí) and candied ginger (mứt gừng) are the traditional choices. They are probably only available at Asian grocery stores. Candied lotus seeds (mứt hạt sen) can also be used. These candied fruits are already sweet so there’s no need for additional sugar in the filling.
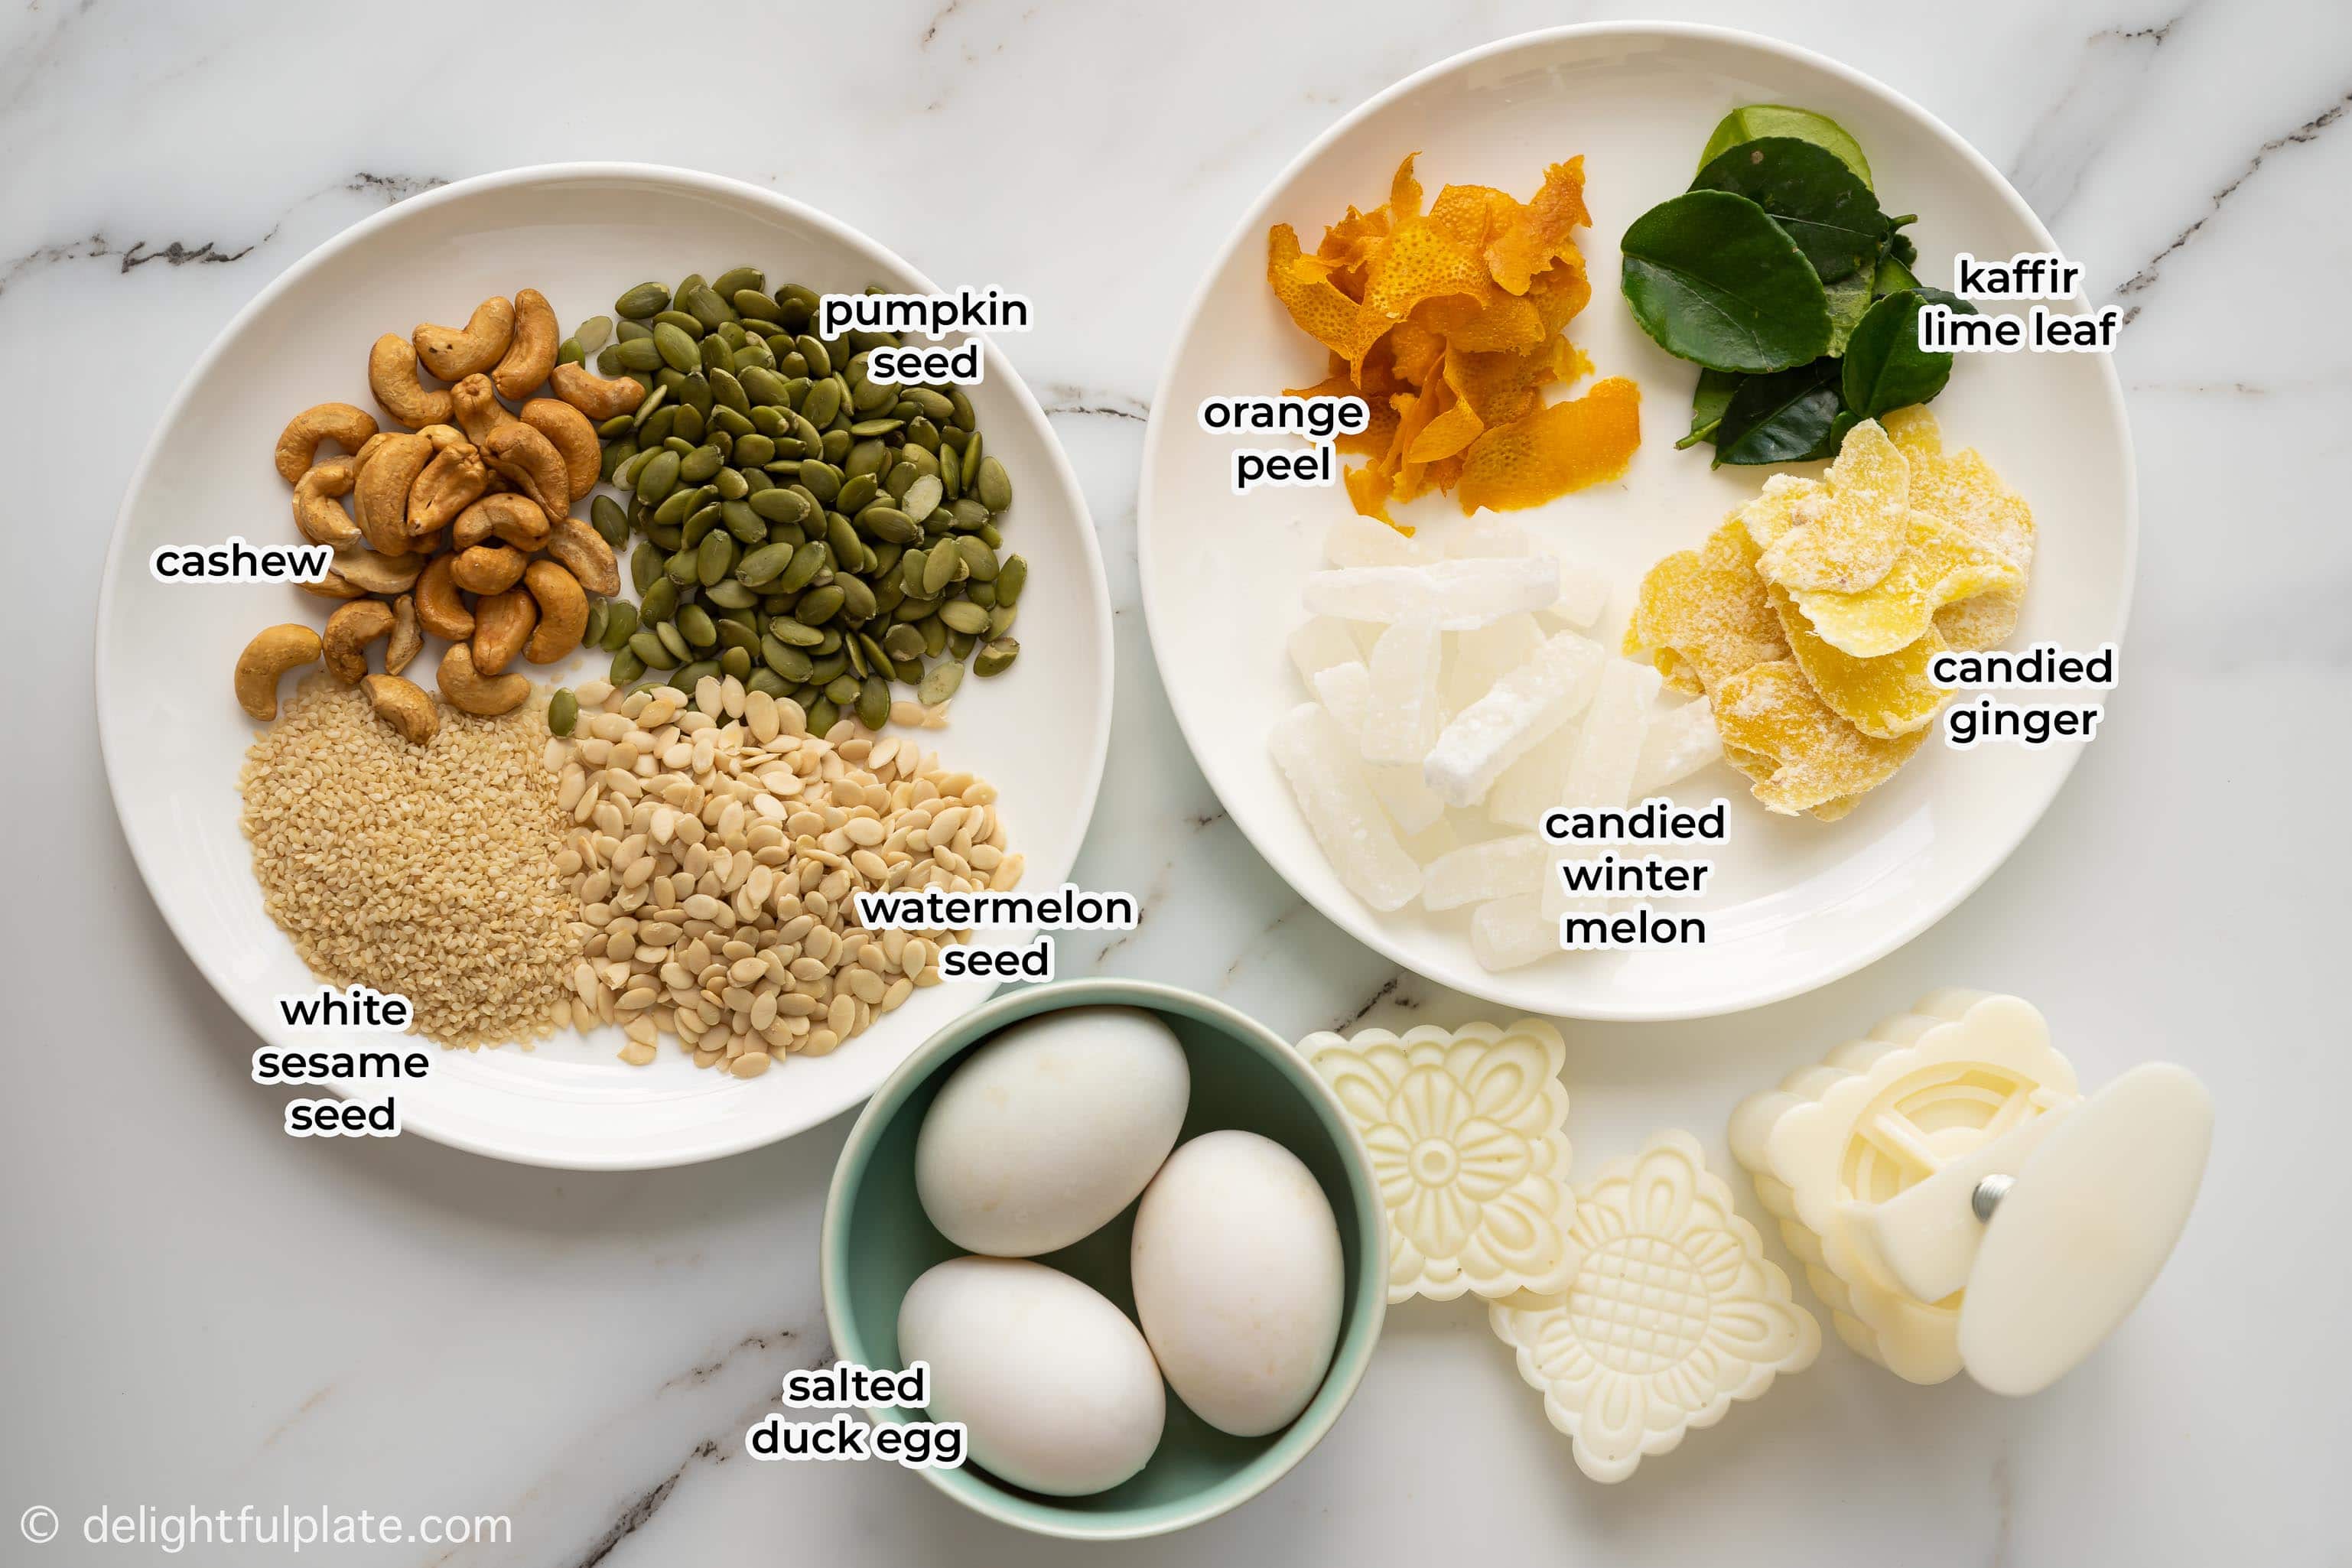
3. Salted egg yolk: this ingredient is optional. It helps to cut the sweetness and richness of the cakes but it’s fine to omit it.
I have a strong dislike for store-bought mooncakes with salted yolks because they have a strong unpleasant odor. For my handmade mooncakes, I rub the yolks with a little of wine and sesame oil before steaming them briefly. The difference in taste and smell is like day and night.
4. Cooked meat: traditional choices are lap cheong sausages (lạp sườn) and roasted chicken (gà quay). I also use pork floss (ruốc/chà bông).
Lap cheong sausage can be found at Asian grocery stores. The roasted chicken is optional, and just use roasted drumsticks with an Asian flavor that isn’t spicy like honey-soy sauce. Generally, you can use a combination, or use just one of the three cooked meat options I listed above, or leave out the meat if you want to keep the cakes vegetarian.
5. Flavorings and Seasonings: kaffir lime leaves, mandarin peel (or orange peel), Mei Kuei Lu wine (rượu Mai Quế Lộ) and soy sauce.
Kaffir lime leaves can usually be found at Asian grocery stores, either in the produce section or the freezer section. I use orange peel from navel oranges and it smells great. With Mei Kuei Lu wine, I’m not sure how hard it is to find. The best place to find it is Asian grocery stores. Traditional lap cheong is usually infused with Mei Kuei Lu. If you don’t have this wine, it is not the end of the world.
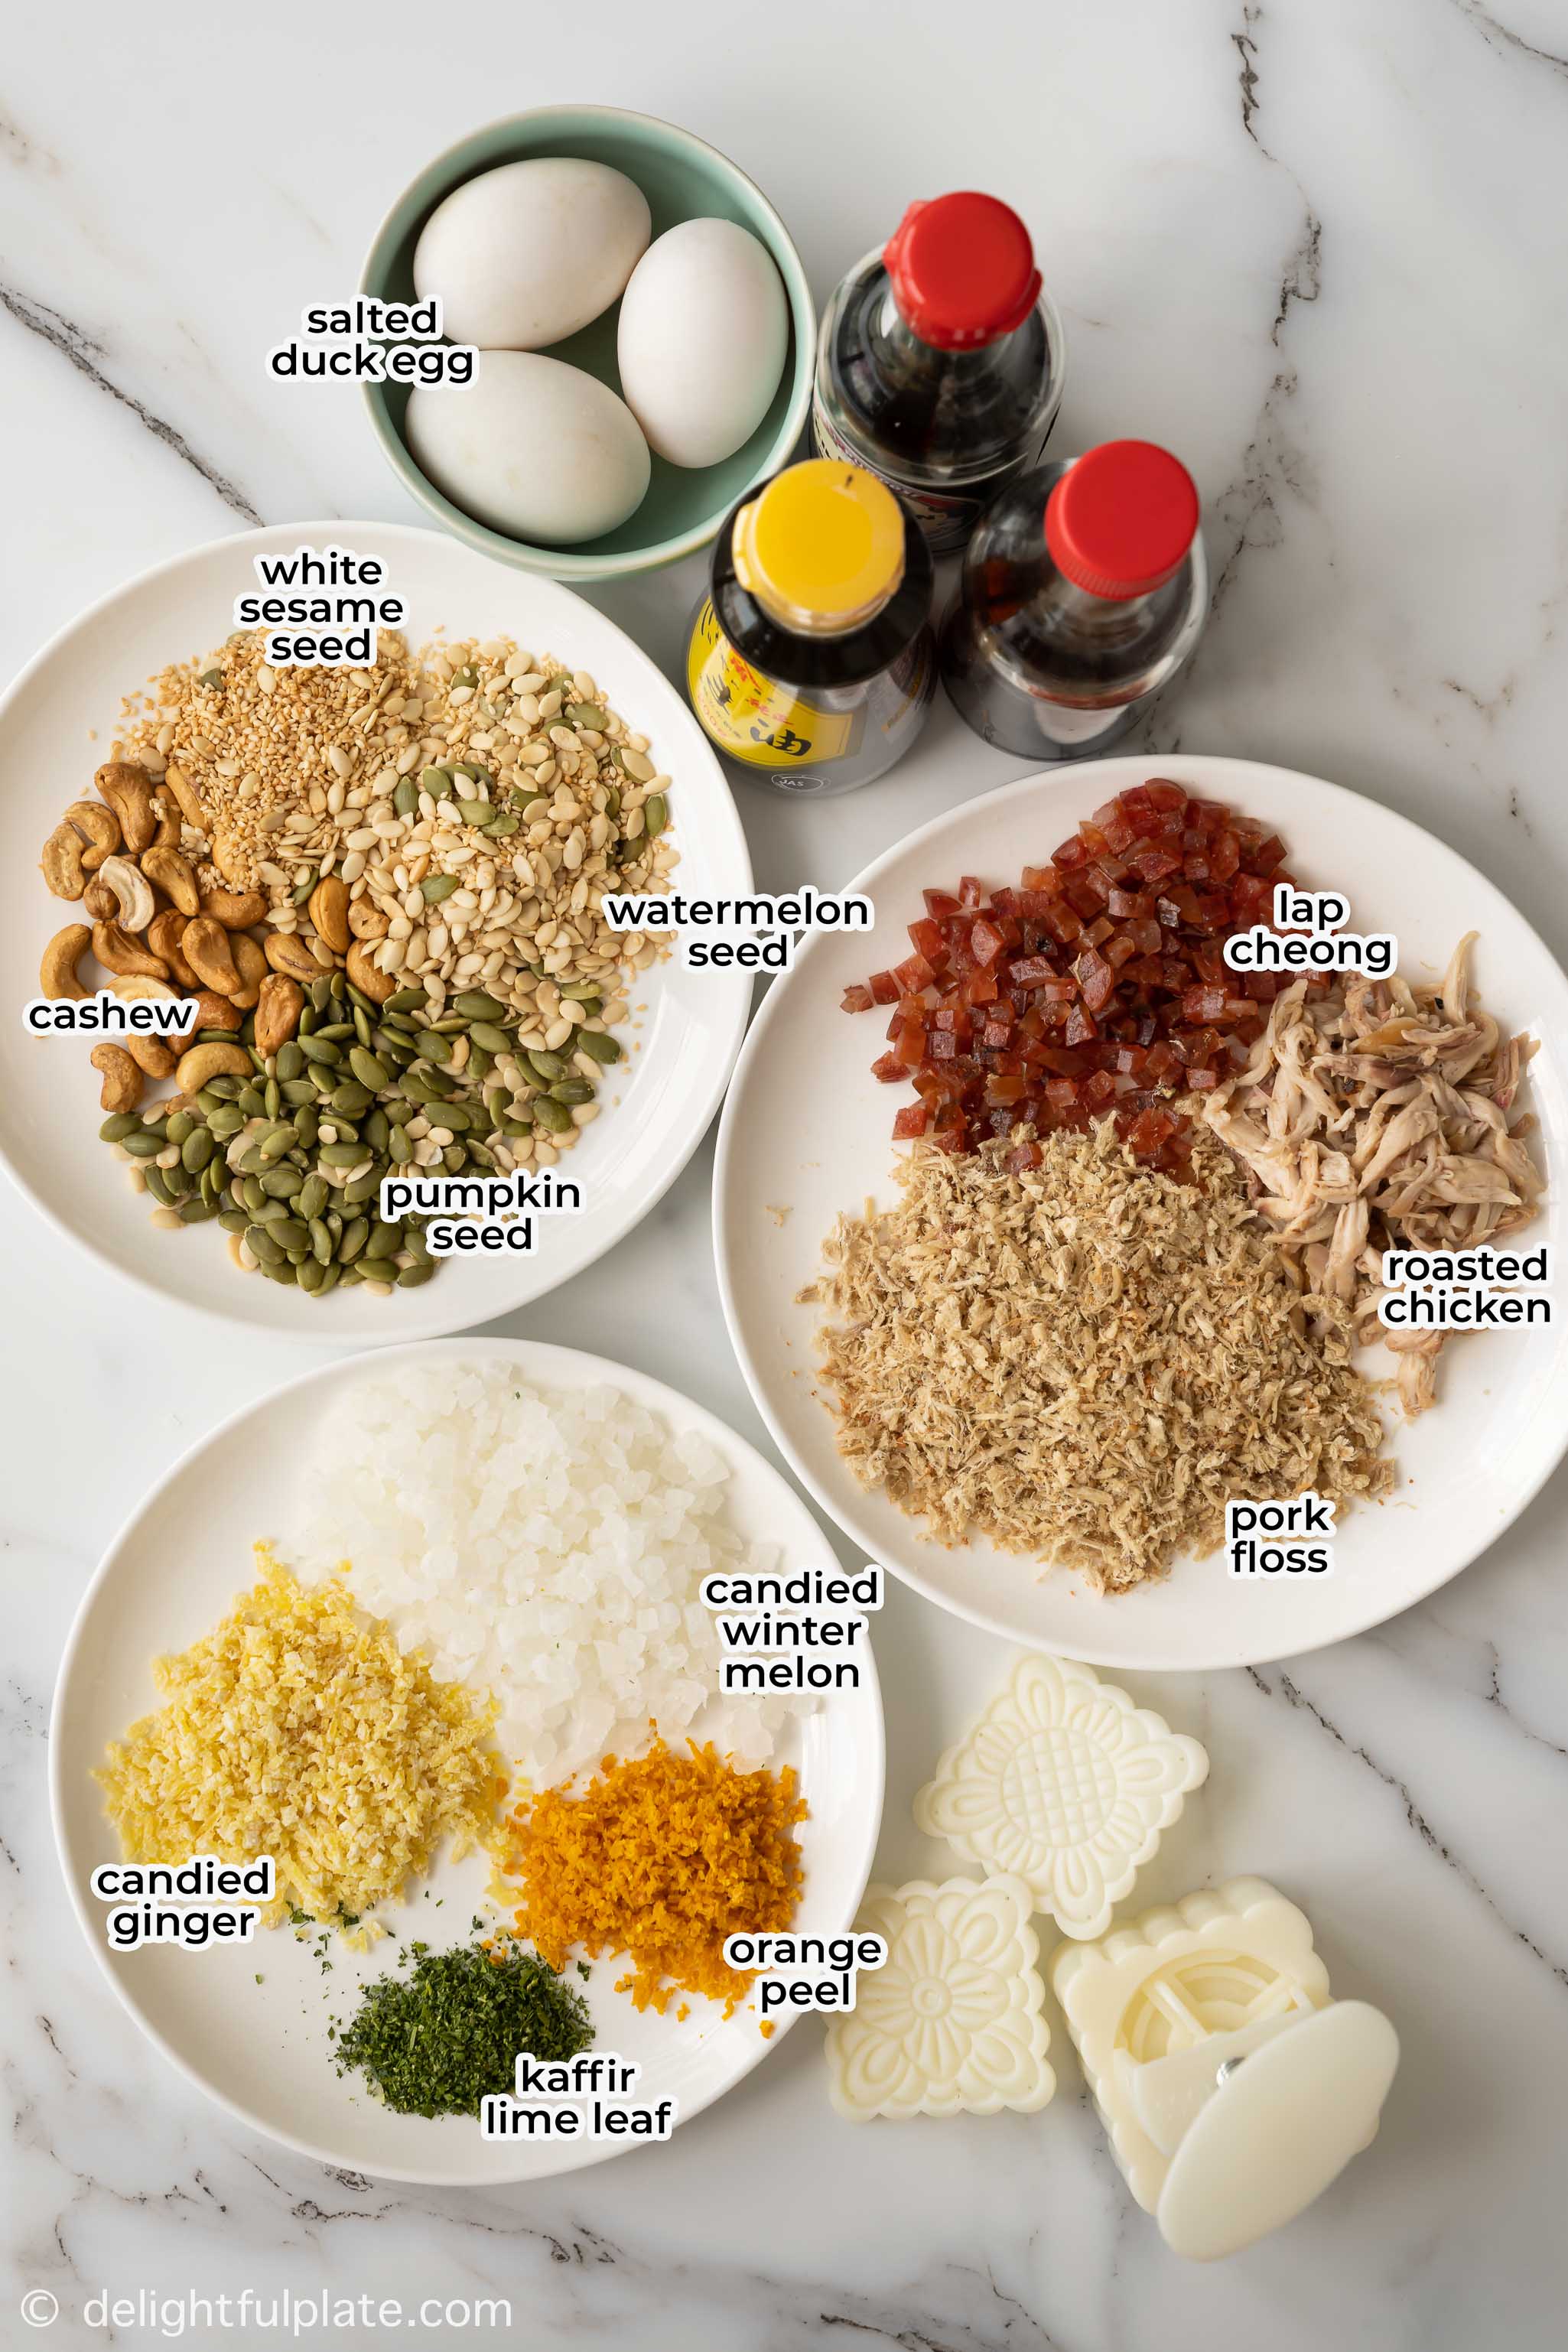
6. Other ingredients: oil and glutinous rice flour. I use a combination of neutral-flavored oil and a touch of toasted sesame oil. Traditional cakes also use small cubes of pork fat but I’m not a fan.
Don’t omit the oil or glutinous rice flour. The flour helps the filling stick together. The oil also helps with that. Moreover, after baking, the oil from the filling will gradually seep out into the dough and make the mooncake skin tender. Right after baking, the skin is still kinda dry and crumbly.
Other Mooncake Flavors
Other popular mooncake flavors in Vietnam are lotus seed, black sesame seed and mung bean. With these kinds of fillings, some general rules to follow are:
- Cook the beans or seeds first. It can be steaming lotus seeds or split mung beans, or toasting black sesame seeds. Then process in a food processor until smooth. Cook the filling on the stove over medium low heat to reduce water content while adding sugar.
- You still need to add some toasted glutinous rice flour and oil to the paste for the same reasons as with the mixed nuts filling. Do it while cooking the filling on the stove. Mung bean and lotus pastes go really well with coconut oil, but for black sesame paste, you should use toasted sesame oil.
Shaping the Cakes
To create beautiful patterns for the cakes, you will need mooncake molds. You can find them at Asian grocery stores or on Amazon. They come in different sizes with all kinds of patterns.
Personally, I prefer those of medium sized with deep patterns. If I make baked mooncakes (bánh nướng), I will use the molds for 100gram (about 3.5oz) cake. If I make snow skin mooncakes (bánh dẻo), I prefer the 75gram (about 2.5oz) ones.
It is quite easy to shape the cakes except for mixed nut filling. Fillings made from seed or bean paste are not hard so you usually don’t need to press too much. However, since mixed nut filling is solid, you may need strong hands for the task. I often leave it to my husband to press the cakes :).
Baking the Cakes
I prefer baking the cakes at medium temperature, from 165°C (330°F) to 185°C (365°F). The baking process includes two, or sometimes three phases with brushing the cakes with egg wash in-between the phases.
- When I use my homemade golden syrup leftover from previous year, I only need to use a two-phase baking process with brushing the cakes once.
- When I use homemade golden syrup made several weeks before, I use a three-phase baking process with brushing the cakes twice. It takes slightly longer and more egg wash for the cakes to turn golden compared to using previous year’s syrup.
Be patient while brushing the cakes. If too little egg wash is applied, the color will be on the light side. However, if you let too much excess egg wash get in the gaps, you may lose the beautiful patterns on the top of the cakes.
Some recipes require spraying the cakes with a thin layer of water before baking to prevent cracking. We’ve never done it and we have baked more than 10 batches of mooncakes and never had cracking. I wonder if using store-bought syrup and lye water can cause that?
Recommended Work Flow
If you don’t have extra helpers (like your spouse), I recommend making a small batch of small to medium-sized mooncakes. When it comes to mooncakes, I believe quality is more important than quantity. Even the process of making it is more important than quantity.
You can also make the filling the previous day, cool and refrigerate, and then prepare the dough and bake the cakes the next day. Let the cakes cool completely then store in a dry place and wait for 1-2 days before eating. I know it’s not easy to resist the temptation, but the cakes will look and taste better after 2-3 days.
I hope my post has empowered you to attempt making mooncakes in your home kitchen. A few years ago, I never thought this was something I would enjoy making. However, fresh mooncakes are so superior compared to store-bought ones that they are worth a try.
Related Posts
I’d love to hear what you think about the dish, so please feel free to leave a comment and a rating if you have tried it. New recipes are added every week so let’s connect on Facebook, Youtube, Pinterest and Instagram for the latest updates. You can find my collection of Vietnamese recipes here.
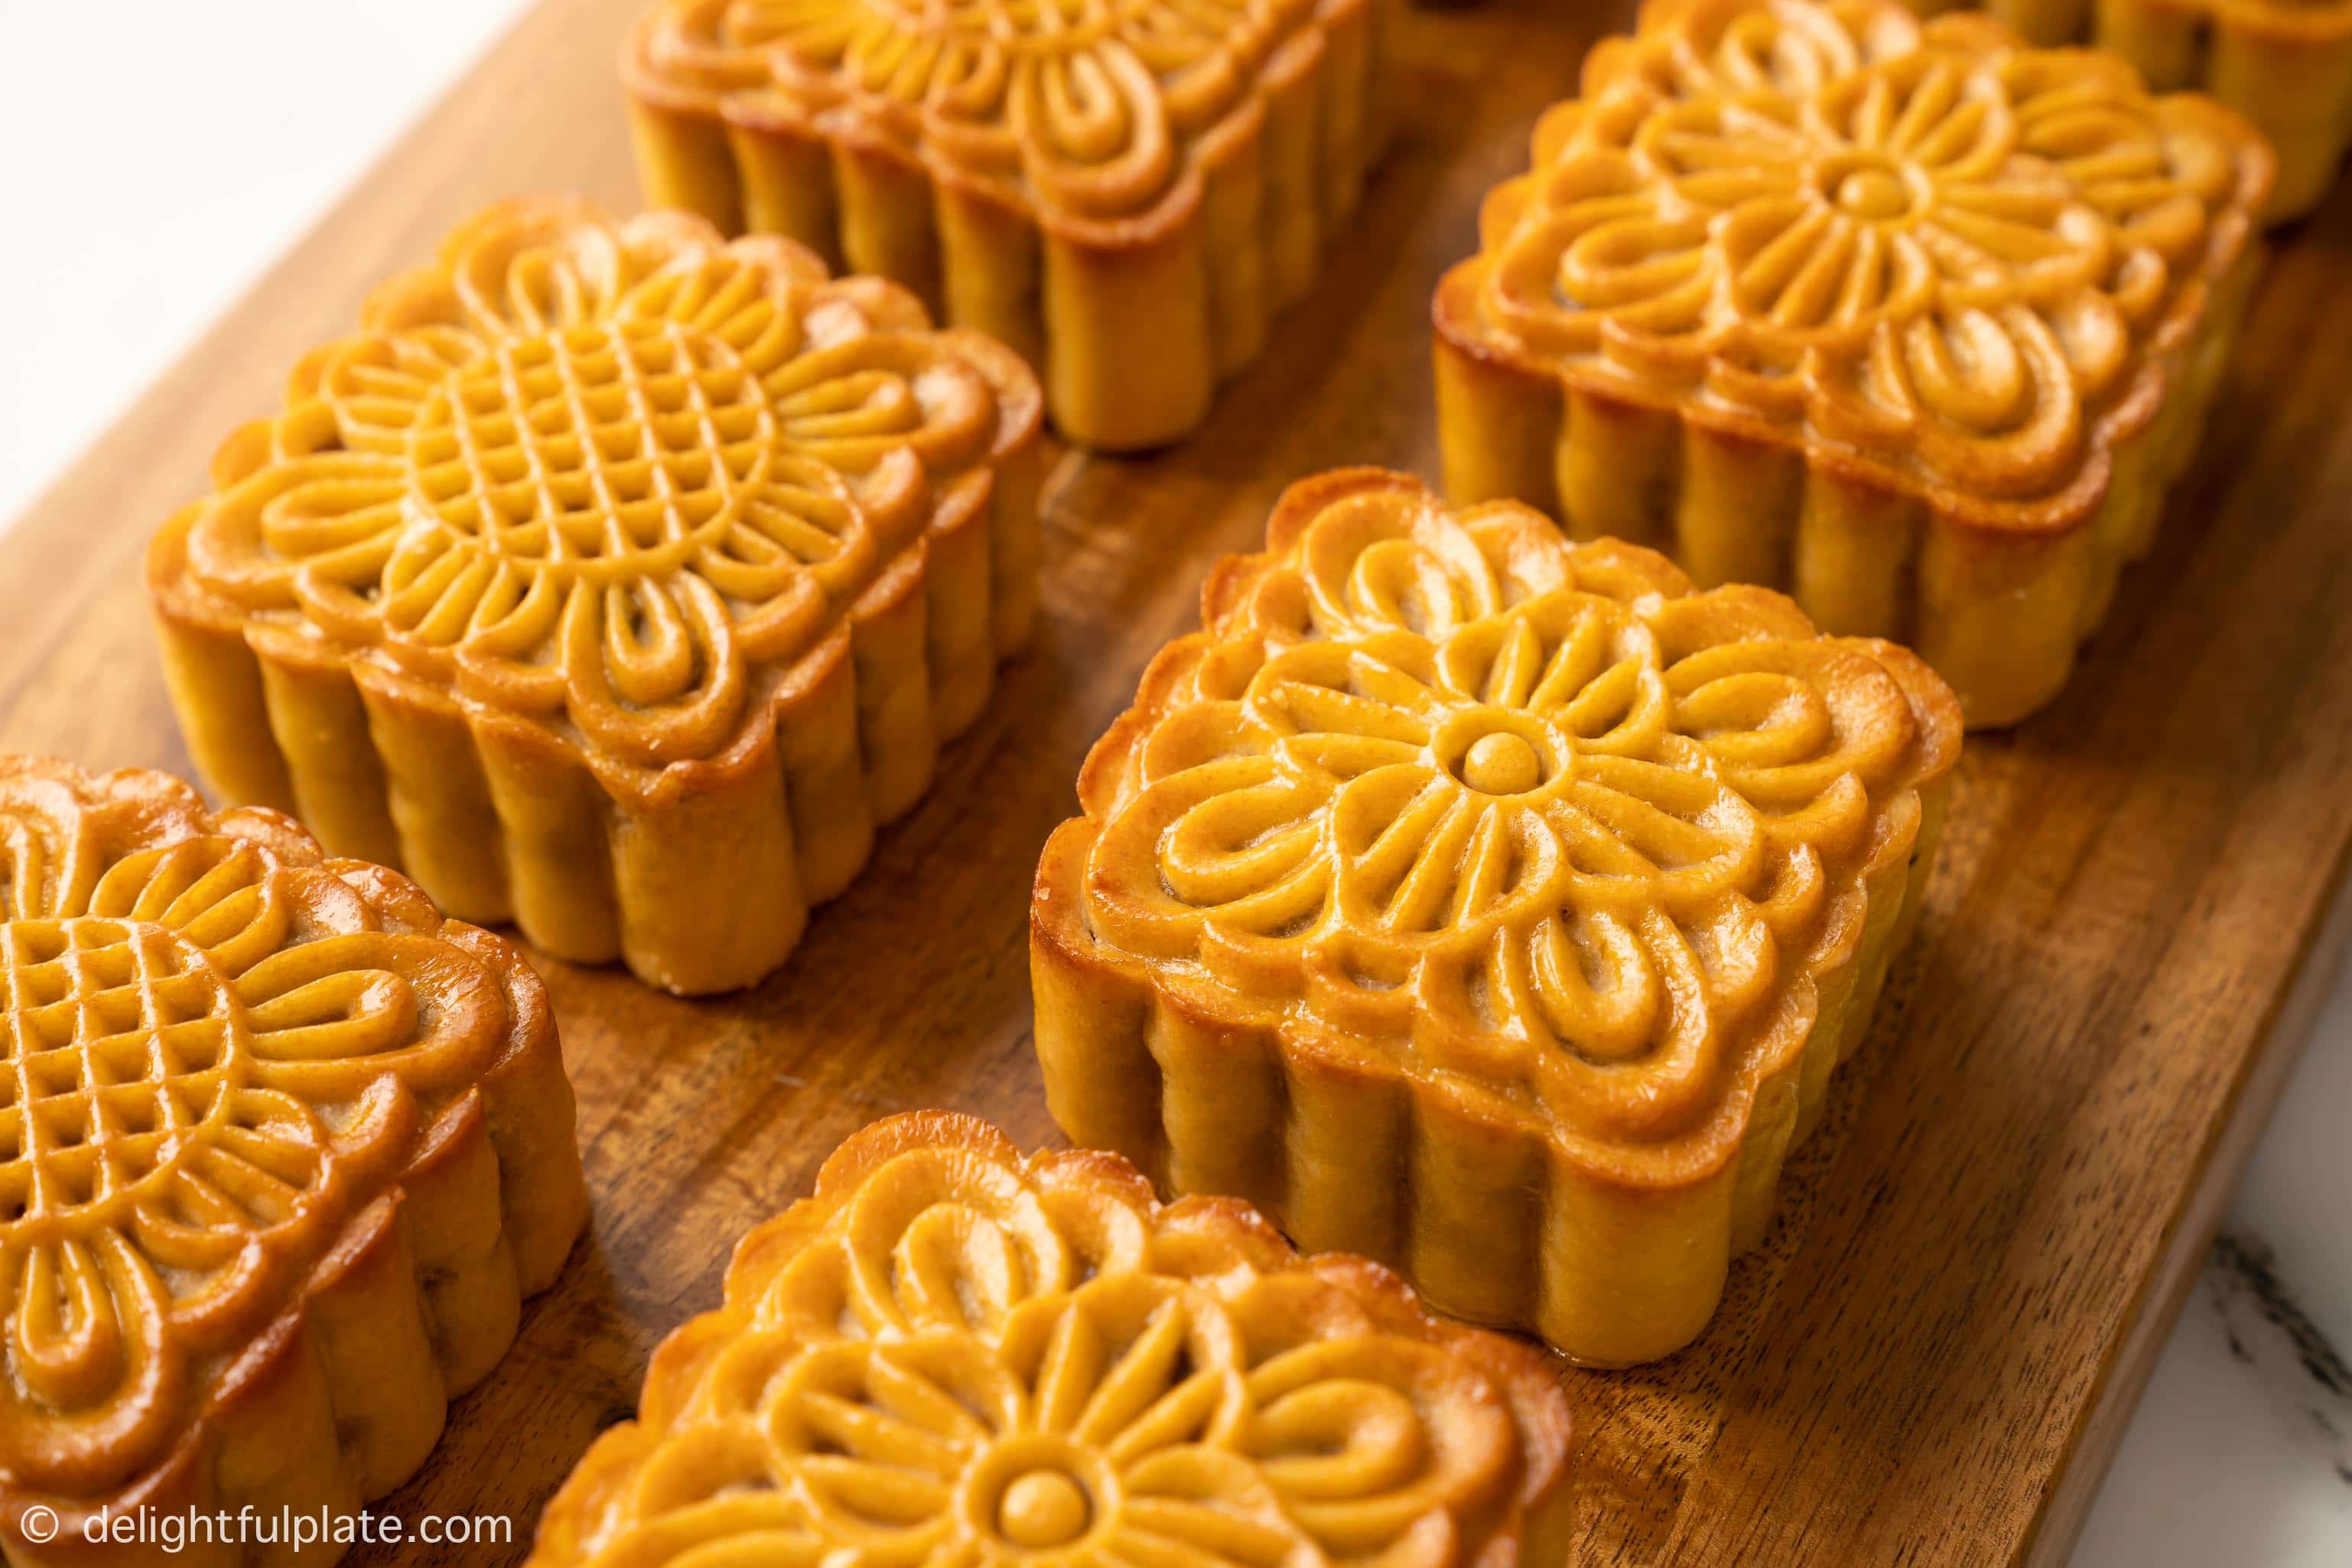
Traditional Mooncakes with Mixed Nuts
Ingredients
For the Mixed Nuts Filling (Not all are required. See Notes at the bottom for more details)
- 0.35 oz orange peel
- 1.75 oz lap cheong sausage
- 0.1 oz kaffir lime leaves
- 2.8 oz candied winter melon
- 1 oz candied ginger
- 1.75 oz pork floss
- 1.75 oz roasted chicken (about 1 roasted drumstick)
- 1 oz roasted cashew
- 0.9 oz roasted pumpkin seed (pepitas)
- 1 oz roasted watermelon seed
- 0.5 oz roasted white sesame seed
- 2 tablespoons water
- 1 tablespoon plus 2 teaspoons Mei Kuei Lu wine, divided
- 1 tablespoon soy sauce
- 2 tablespoons neutral-flavored oil, plus more for cooking
- 1 1/2 teaspoon toasted sesame oil, divided
- 2 tablespoons glutinous rice flour, toasted (see Notes for more details)
- 8 salted duck egg yolks
For the Mooncake Dough
- 7 oz all-purpose flour or cake flour, plus more for dusting
- 1/4 teaspoon baking soda
- 1 large egg yolk
- 1 oz neutral-flavored oil
- 3.75 oz homemade golden syrup
For the Egg Wash
- 1 teaspoon homemade golden syrup
- 1 teaspoon water
- 1/2 teaspoon sesame oil
- 1 large egg yolk
Instructions
Prepare the Filling
- Poach orange peel in boiling water for 10-15 seconds. Also poach lap cheong for 1-2 minutes.
- Julienne then mince orange peel and kaffir lime leaves finely. Cut candied winter melon and ginger into thin strips then dice into small pieces.
- Cut lap cheong into thin strips then dice into small cubes. Cut pork floss into short pieces and shred roasted chicken into thin strips, if using.
- Add cashew to a food processor and pulse a couple of times. Then add all remaining nuts and pulse a few more times.
- Add a bit of oil to a pan over medium heat. Then add roasted chicken and lap cheong, stir and cook briefly until fragrant.
- Add all other ingredients: pork floss, mixed nuts, candied fruits, orange peel and kaffir lime leaves to the pan. Stir to distribute all ingredients evenly in the mixture.
- Add 2 tablespoons of water to the pan, stir to combine. Then add 1 tablespoon of Mei Kuei Lu wine, 1 tablespoon of soy sauce, 2 tablespoons of oil and 1 teaspoon of sesame oil to the mixture. Stir to combine thoroughly. You can taste and adjust the flavorings to taste.
- Add 2 tablespoons of glutinous rice flour to the pan. Stir to combine thoroughly. The filling should stick to itself (not tightly, but not too loosely) when you press it together. If it does not stick, you can add a bit more oil and glutinous rice flour. Transfer to a plate to cool.
- Place salted duck egg yolks in a heat-proof plate and mix gently with 2 teaspoons of Mei Kuei Lu wine and 1/2 teaspoon of sesame oil. Cover and steam for 7 minutes, then set aside to cool.
- Prepare a scale with a piece of plastic wrap on top. Place about 20-25 grams (0.7-0.9 oz) of filling on top of the plastic wrap, then place a salted egg yolk, and top with enough filling so that the total weight is 60 grams (2.1 oz). Wrap the plastic wrap around the filling, twist, turn and apply pressure to form the filling into a small ball. You can watch this step in the video. Continue with the remaining filling. We will need 8 small balls of filling.
Prepare the Dough
- Add flour either to a mixing bowl or on a clean working surface. Sprinkle baking soda over flour and then mix thoroughly.
- Make a small well in the center of the flour, then add an egg yolk and 30 grams (1 oz) of oil. Use your hand to break the egg and mix it with the oil. Then add the golden syrup. Fold and knead the mixture into a smooth dough. Shape it into a ball, cover and rest for 40-45 minutes.
- After resting the dough, knead it briefly, just several seconds. Then divide the dough into 8 pieces, each piece weighs 40 grams (0.14 oz). Roll and form each piece into a small ball.
Assemble the Cakes
- Take a dough ball and flatten it out with your fingers or with a rolling pin. Place the filling ball in the center. Wrap the dough around the filling to seal the filling completely. You can watch how to do this in the video. Continue to wrap all the filling balls with the dough balls.
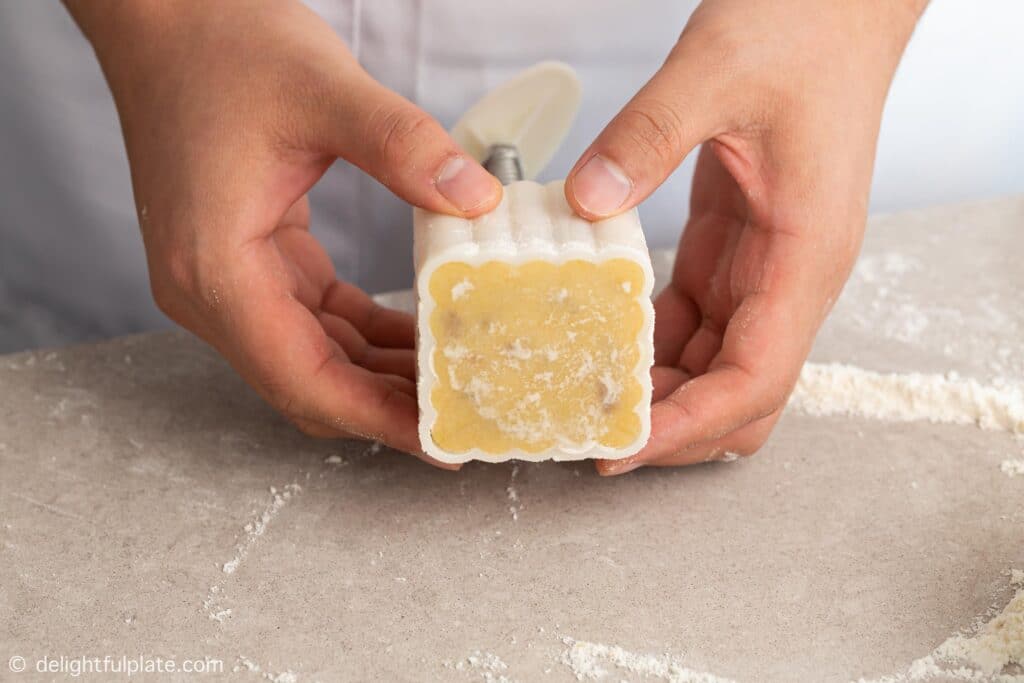
- Dust your hands with flour. Roll the mooncake in your hands to lightly dust it with flour. Also dust the mooncake mold with flour thoroughly.
- Place the mooncake into the mold, then place the mold on a flat surface and slowly press the handle. You may need to release the handle, press again and repeat a few times. The first press can be gentle, then increase the pressure with subsequent presses. Dust the bottom with additional flour as needed.
- Check the bottom of the mold. If all corners are evenly filled with dough, you can release the cake from the mold.
Bake the Cakes
- Preheat your oven to 365°F or 185°C. Arrange mooncakes on a baking sheet lined with parchment paper. Use a small and sharp needles to poke several small holes on top and on the sides of the cakes. Try to make the holes not too obvious. Bake for 10 minutes.
- While baking the cakes, prepare the egg wash by mixing all ingredients for the egg wash together.
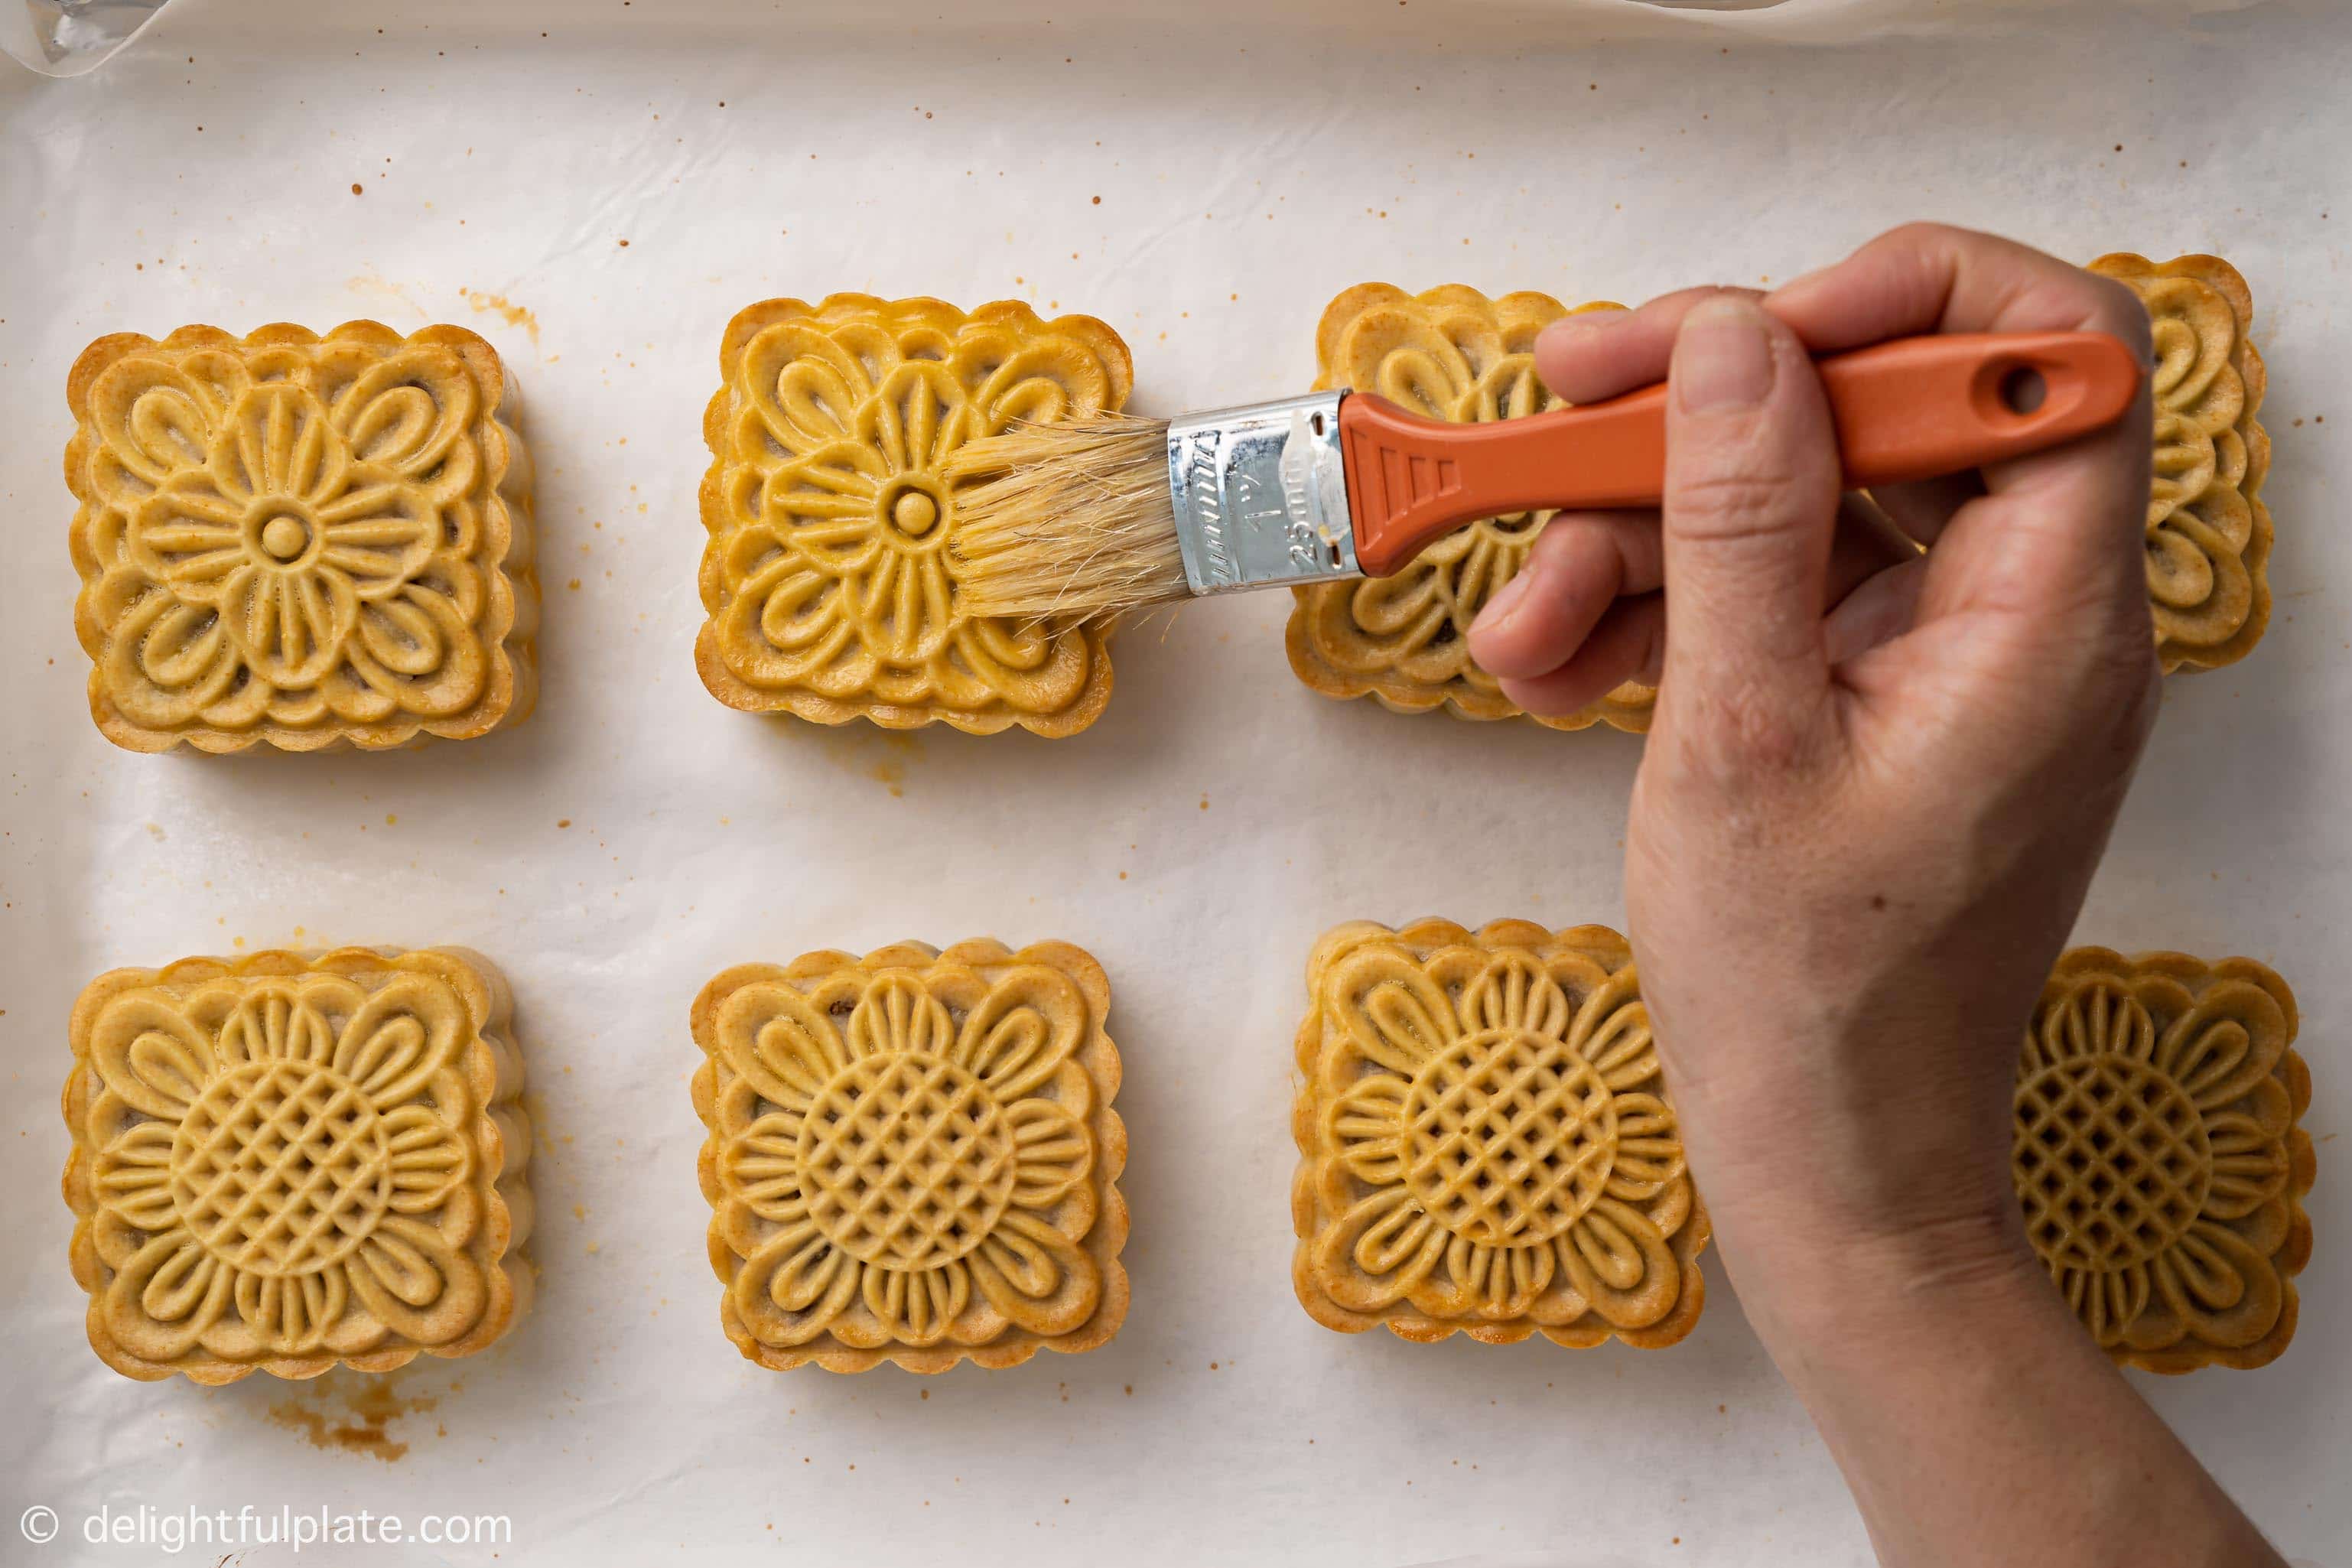
- Take the cakes out of the oven and lower the oven temperature to 330°F or 165°C. Carefully brush all sides and the top of the cakes with egg wash. Don't let excess egg wash fill the gaps on the top of the cakes or the patterns will not turn out pretty. Bake the cakes for another 7 minutes.
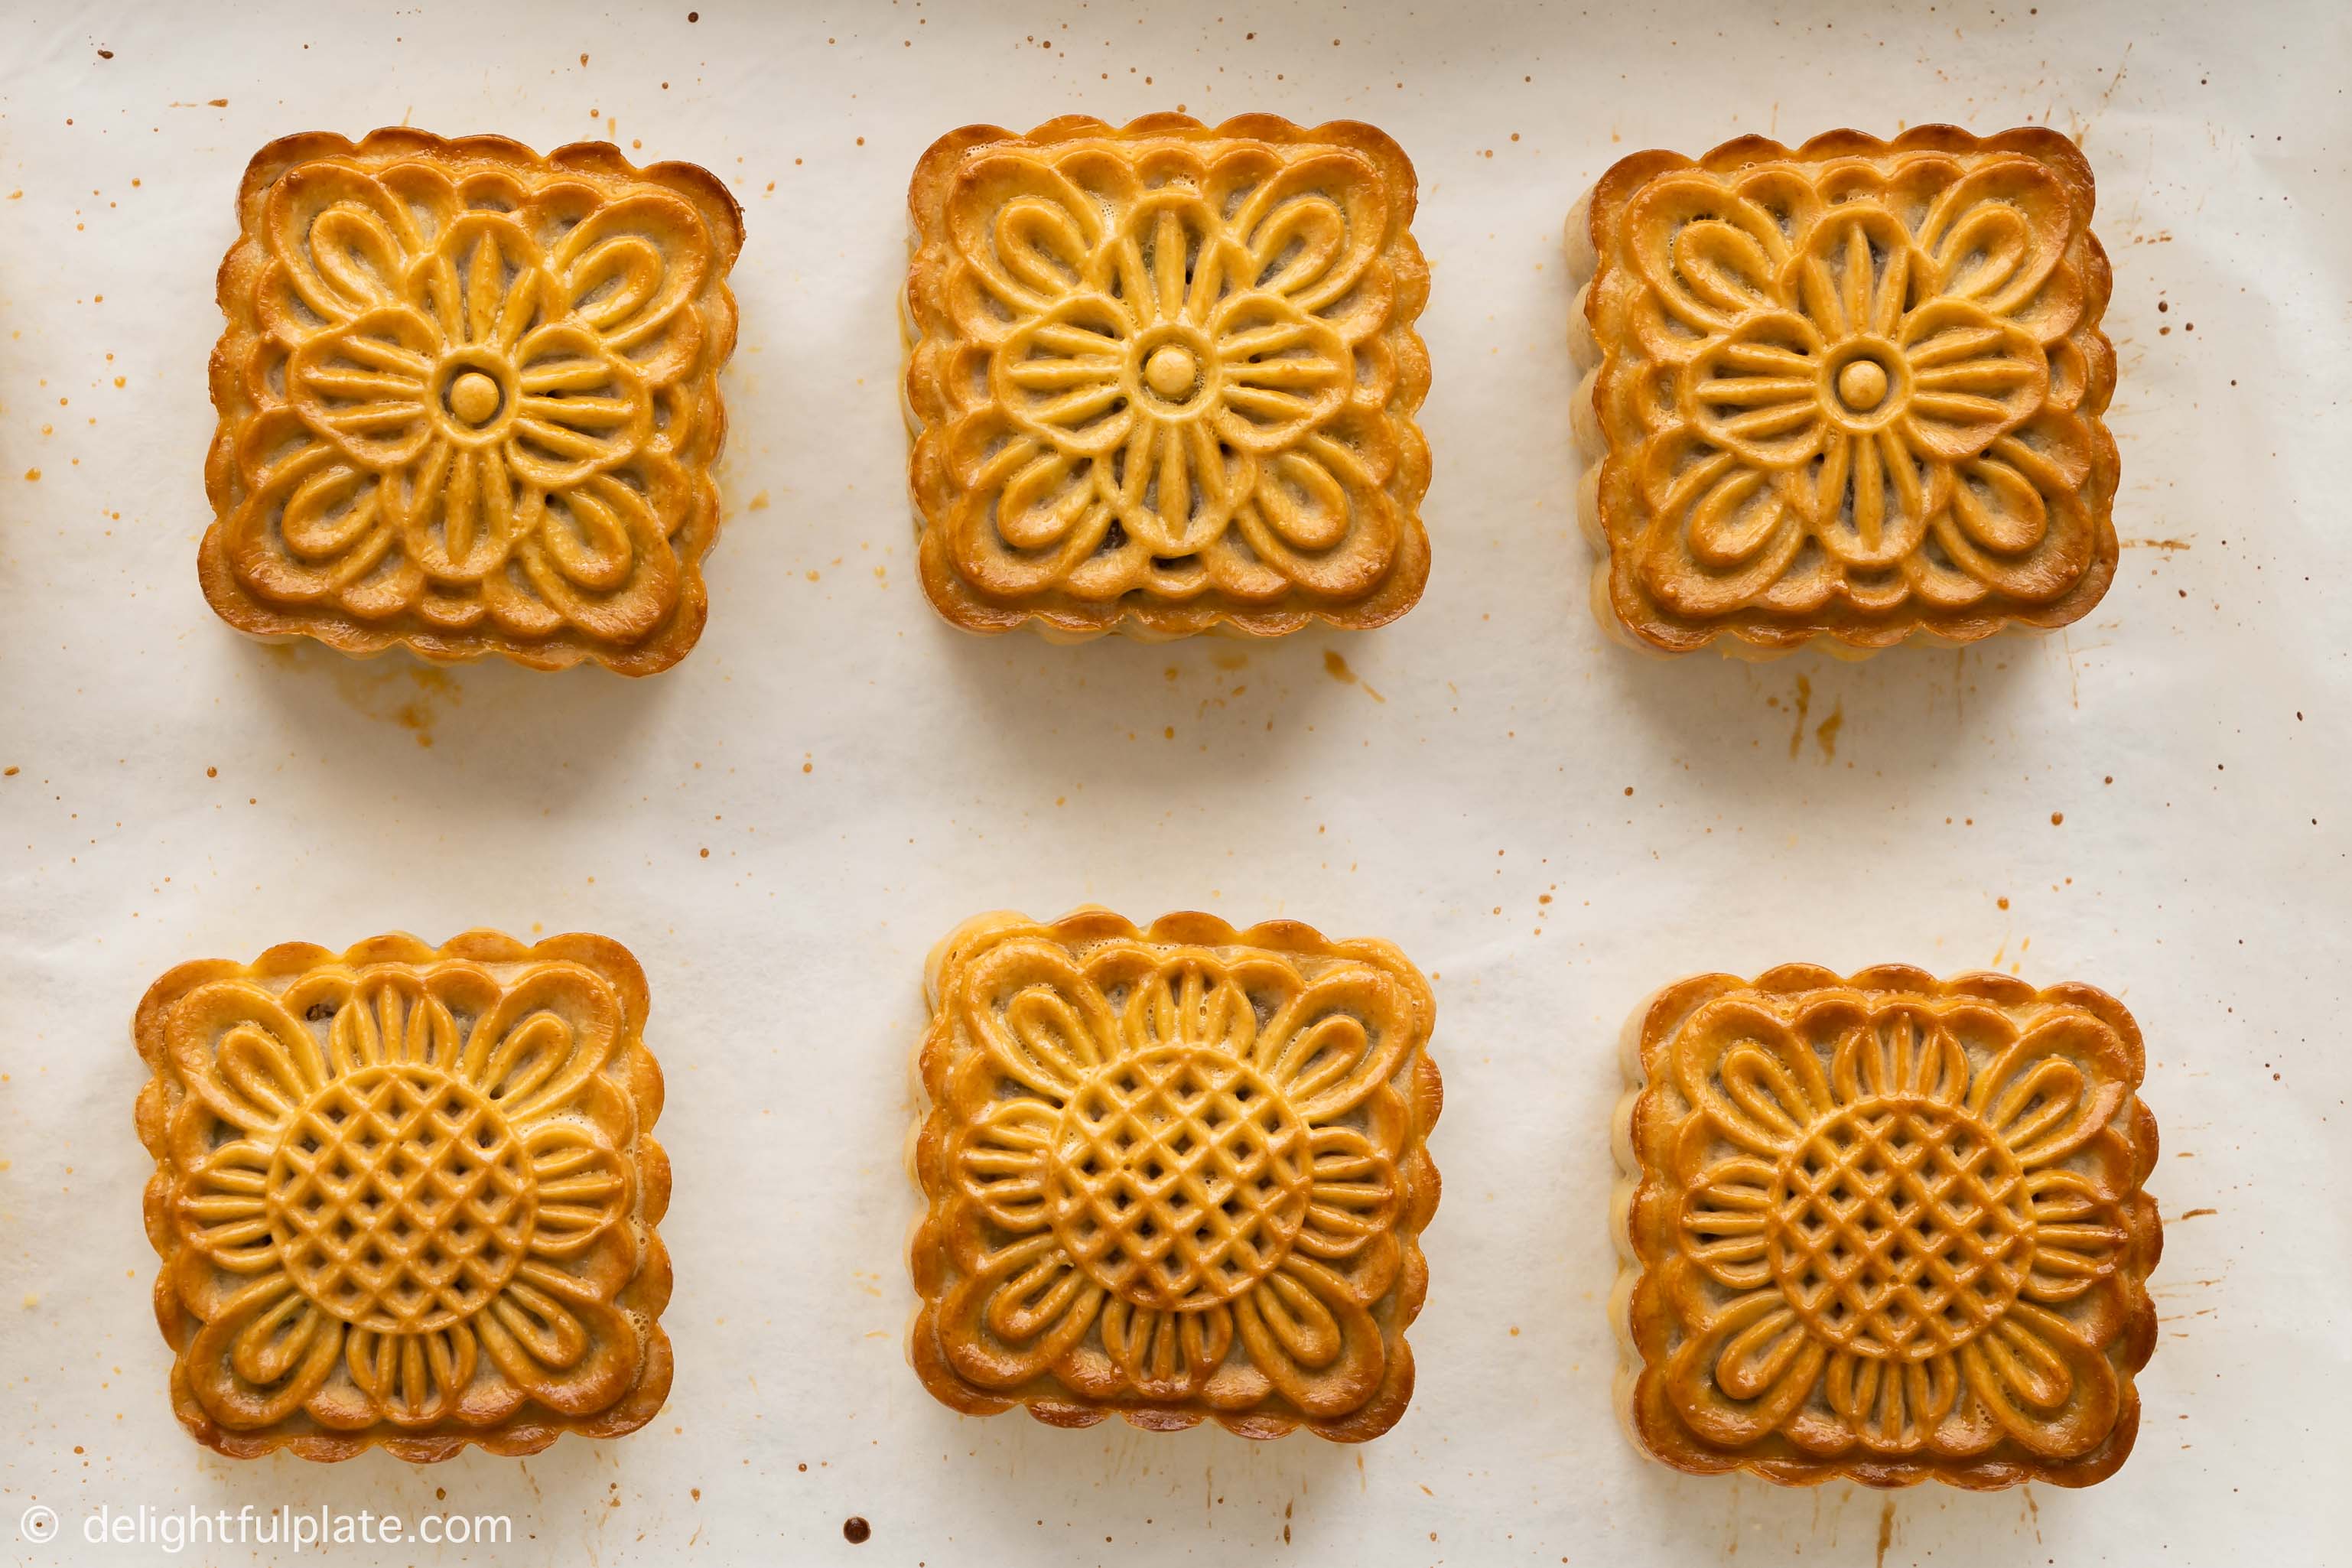
- Take the cakes out of the oven and brush all sides and the top one more time. Then bake for another 7-8 minutes or until the cakes are golden.
- Let the mooncakes cool completely on the baking sheet. Then store them in a cool, dry place and cover. They taste best after about 2-3 days. After 3 days, you can store them in the refrigerator for 1-2 weeks.
Video
Notes
- For the filling, you don’t need to use all the nuts and cooked meat listed in the list. Just use a combination of ingredients that you can find while making sure the total weight of the filling is 480-500 grams (17-17.5 oz), including the salted egg yolks. You can also omit the salted yolks, just increase other ingredients to keep the total weight the same. Each salted egg yolk weighs about 11-14 grams (0.4-0.5 oz).
- Among the choices for cooked meat, lap cheong is the most essential one. You can omit the pork floss and roasted chicken, and replace with other ingredients like nuts.
- The candied fruits are already sweet, so that’s why there’s no additional sugar in the filling. You can use candied winter melon, candied ginger or candied lotus seed. If you cannot find them at Asian grocery stores, you may try using dried fruits that are sweet.
- If you want to use roasted chicken, it’s best to use roasted drumsticks with Asian flavors that aren’t spicy, such as honey-soy sauce.
- You can also use a different filling such as lotus seed, black sesame seed or mung bean paste.
- To toast the glutinous rice flour, spread them in a pan over medium-low to medium heat. Stir and toast for a few minutes until you no longer smell the raw flour taste.
- Cake flour will result in a slightly softer mooncake skin. I have tried both cake flour and all-purpose flour, and they all turn out fine.
- This mooncake dough recipe is specifically tested with our golden syrup recipe. If you decide to use store-bought syrup, the result may be slightly different, but please feel free to adjust and experiment.
- If the temperature in your oven is uneven, you may want to rotate the baking sheet so that the cakes will have even colors. I also prefer a light-colored baking sheet over a dark one for this recipe. The bottom of the cakes may get darker colors when baked on a dark-colored baking sheet. You can avoid this by lining the baking sheet with 2 or 3 layers of parchment paper.
- When it comes to oven temperature and baking time, you may need to adjust as needed since not all ovens are the same. Some recipes require spraying the cakes with a thin layer of water before baking to prevent cracking. We’ve never done it and we have baked more than 10 batches of mooncakes and never had cracking.
- I recommend reading the post for detailed explanations and tips if you have time.


This Traditional Mooncakes with Mixed Nuts is absolutely delicious! You just need a little patience since it requires many processes and needs a bit of time to make. But it’s definitely worth it! The whole fam loved it! Best paired with Vitasoy Lychee Flavor Vita Juice Drink.
Thanks for posting such an in depth overview of this! I had this for the first time and didn’t know what I was eating so I went on an extensive google search. We usually ate Chinese mooncakes at home so this was super interesting!!
Hi Anna,
Thank you for the comment! I’m glad you found the information helpful :). I think this filling is quite hard to find outside of Vietnam. I’m happy you gave it a try this year.